How to make a virtual machine with VirtualBox
August 2021 (1770 Words, 10 Minutes)
So you want to create a virtual machine, but you don’t know how? Well, let me tell you that it’s actually not that difficult to do. Whether it is to try a new operating system, test software on another operating system, or run games on another operating system (ok, maybe don’t do this one), a virtual machine will come in handy. There are a few virtualization software that we can choose from, but for this tutorial, we will be using Oracle’s VirtualBox.
Before you start…
Make sure your device supports virtualization. Most recent computers/laptops support virtualization, so you won’t really have to worry about this. However, if you are running an older computer, check to see if your computer supports virtualization.
Additionally, make sure your computer has the following:
- At least 4 GB of RAM
- A CPU with at least 4 cores
- Decent Graphics Card
These are generally the minimum amount of resources you need to run a VM. Keep in mind that these are not hard requirements. You will still be able to run a virtual machine with a less powerful computer, however, you will probably have a very slow and sluggish virtual machine.
To have a virtual machine running smoothly, it would be best if you have:
- At least 8 GB of RAM
- A recent CPU with at least 8 cores
- A high end graphics card
- An SSD instead of a HDD
Step 1: Download VirtualBox from the official website
Go to https://www.virtualbox.org/ and click on the big blue button that says “Download VirtualBox” in the middle of the page.
Under “Virtual box platform packages”, click on the operating system that you are running to download the appropriate file. After the file is downloaded, run it and follow the steps on the installation process dialog (if downloading on Mac or Windows).
Note: If you are running Linux, you will have to go through an extra step. Once you click on the “Linux distributions” option, you will be taken to a page titled “Download VirtualBox for Linux Hosts”. Once there, under “VirtualBox for Linux”, click on the Linux distribution that you are running. If you don’t see your specific Linux distribution on the list, click on the Linux distribution that your distribution is based on. For example, if your Linux distribution is Linux Mint 20, click on the “Ubuntu 19.10 / 20.04 / 20.10 / 21.04” option (since Linux mint is based on Ubuntu). If neither is on the list (as is the case with Arch based distributions), try looking for VirtualBox in your distribution’s package manager.
Step 2: Create a new virtual machine
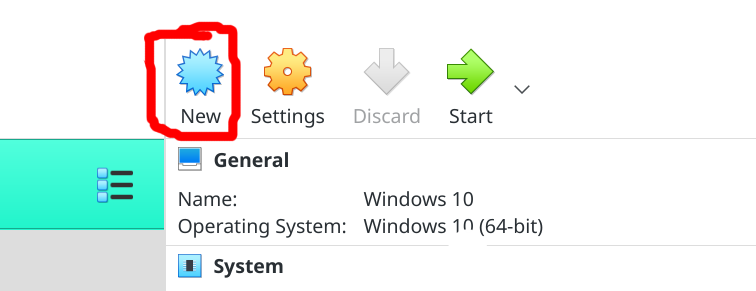
Once VirtualBox is installed on your system, open the application. To create a new virtual machine, click on the “New” button at the top of the screen.
You should see a dialog box that looks like this:
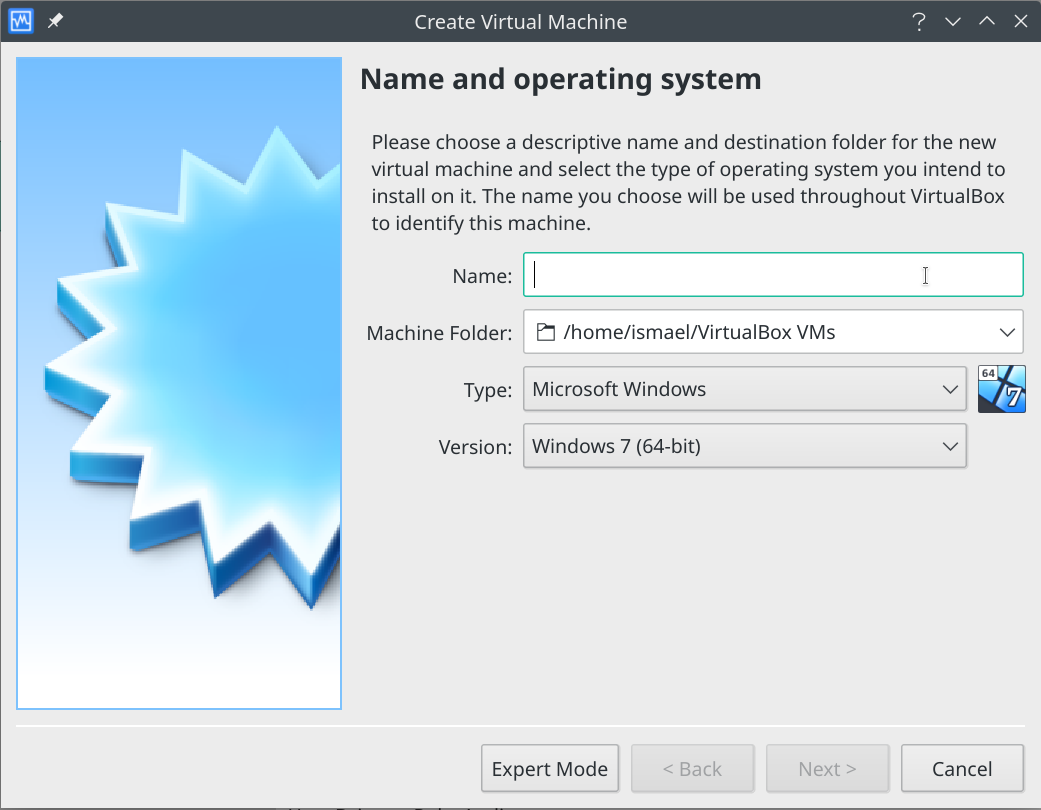
In the “Name” input field, give a name to your virtual machine. If the name is similar to the name of an operating system (such as Windows 10), VirtualBox will automatically adjust the virtual machine type.
After you have given the virtual machine a name, select where you would like to store the virtual machine. You can either type the path manually or click on the downwards pointing arrow to the right of the folder path input field and click on the “Other” option in the dropdown menu. A file explorer dialog box will appear in which you can select where you would like to store your virtual machine.
Next, select the operating system type in the drop down menu next to “Type” and select the operating system version in the drop down menu next to “Version”. Click on the “Next” button on the bottom right corner once you are done.
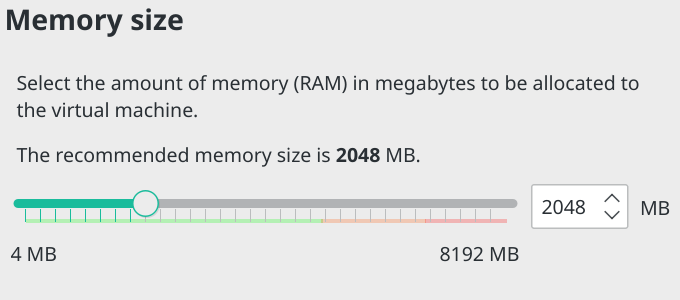
After that, you will need to select the amount of RAM you would like to allocate to your virtual machine. You can stick with the recommended amount for now. Note that the amount of RAM you are allocating will be unavailable to your host operating system only when the virtual machine is running.
Next, you will create a Virtual hard disk file. You can either choose an existing file, create a new disk file or decide to not create one at all. Select the “Create a virtual hard disk now” option and click on “Create”. A dialog will appear asking you to select a file type. For now, select the “VDI (VirtualBox Disk Image)” option. Click “Next” and choose whether you would like the virtual hard disk to be dynamically allocated or have a fixed size. The dialog gives you more information about each option. If you don’t know which one to choose, just leave it at it’s default and click “Next”.
Now you will need to choose the size of the disk file and where to store it. For the storage location of the file, you can leave it as is or change it. To change it, you can either type in the path manually or click on the button to the right of file path input field to bring up a file navigation dialog.
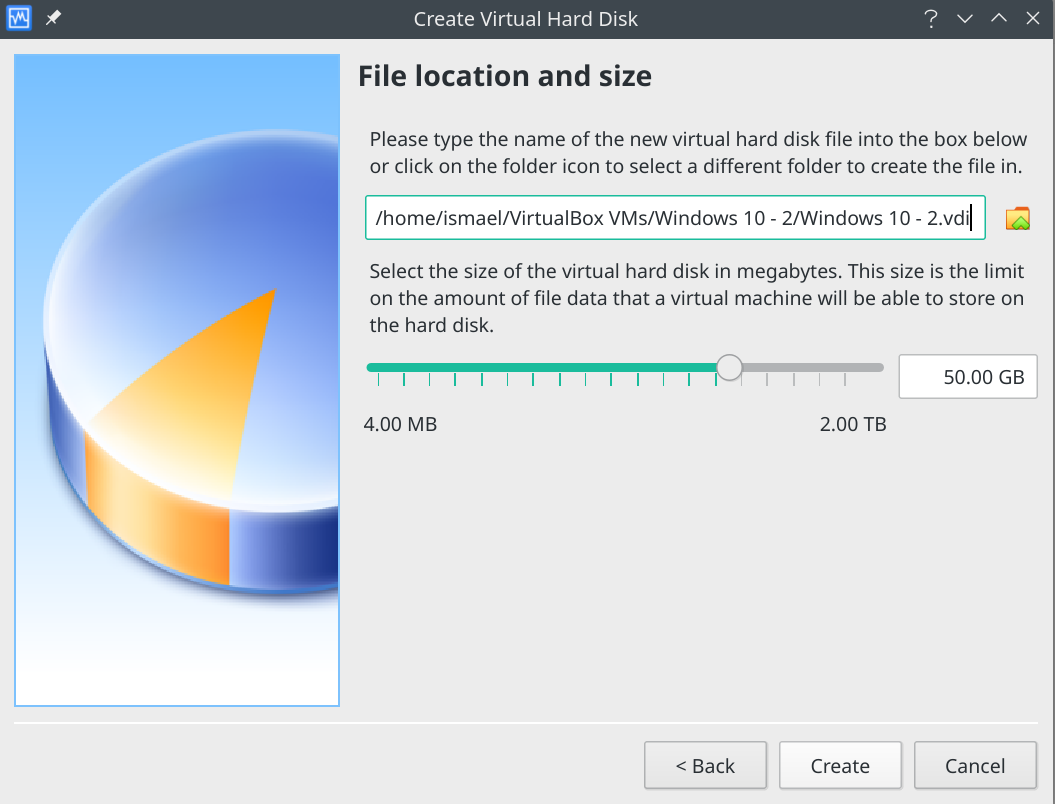
To choose the size of the virtual hard disk, you can either move the slider or type the size (in GB or MB) manually in the input field next to the slider. After you are happy with the amount, click on “Create”.
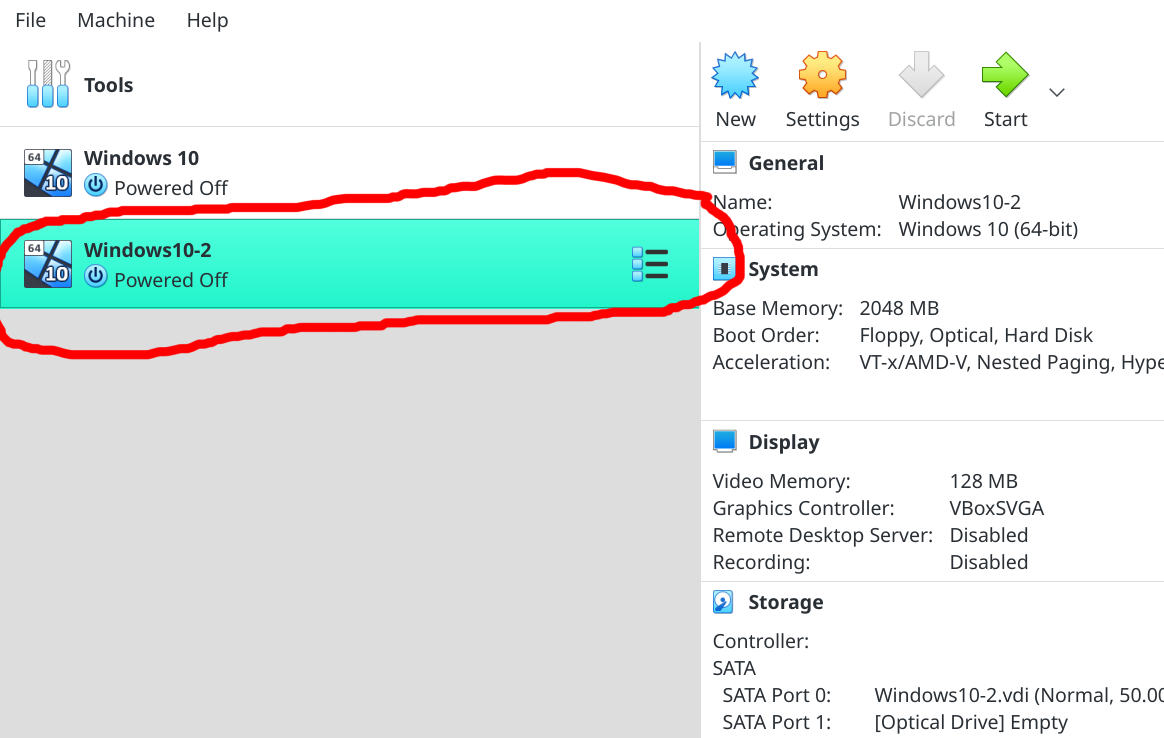
Congratulations! You have created a virtual machine. It should now appear on the left side of the VirtualBox home page below the “Tools” section.
Step 3: Download the ISO file for the operating system you would like to download and attach it to your virtual machine
In order to continue, you will need to find and download the appropriate ISO and attach it to your virtual machine. The ISO file you download will depend on the operating system you would like to install. So if you would like to install Windows 10 on your virtual machine, then you would need to download the appropriate Windows ISO file from Microsoft’s website. Please remember to be careful when downloading ISO files, as you don’t want to use a pirated or compromised file. Make sure you are downloading the file from the correct site and make sure to check the file’s integrity before you use it. If you don’t know how to check a file’s integrity, here is a useful resource that could help.
Once you downloaded the ISO file and checked it’s integrity, you need to attach the file to your virtual machine’s storage device. To do that, you will need to click on the “Settings” button next to the “New” button you clicked earlier.

In the dialog that comes up, click on the “Storage” tab on the left. Here, under “Storage devices”, select the slot with a disk icon named “Empty”. Once selected, under the “Attributes” section to the right, click on the icon that looks like a disk with a downwards pointing arrow. In the dropdown menu that comes up, click on the “Choose/Create a Virtual Optical Disk” option.
A dialog with a list of ISO files you’ve used will come up. If you don’t see the ISO image you downloaded on the list, then click on the “Add” button at the top left and search for the ISO file using the file navigation menu.

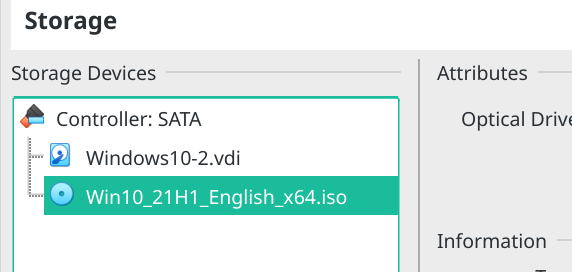
Once the file is added to the menu, select the file in the menu and click on “Choose” at the bottom right. The option that used to be “Empty” should now have the ISO file you chose.
Click “Ok” at the bottom right of the dialog to save your adjustments.
Step 4: Adjust settings if necessary
To adjust the settings of your virtual machine and change the amount of resources allocated to it, click on the “Settings” button.
Then, to change the amount of memory and CPU’s allocated to your virtual machine, click on the “System” tab on the left. There, you will have 3 tabs, Motherboard, Processor, and Acceleration.

Since you already selected the amount of RAM you where going to allocate earlier, we can ignore the Motherboard tab for now. Click on the Processor tab to change the amount of CPU’s allocated to the virtual machine. The default is 1 CPU, which is probably not ideal since that will make your virtual machine quite sluggish. It’s best to change it to 2 or more CPU’s, if your computer has that many.
Use the slider next to “Processor(s)” to choose the amount of CPU’s you would like to allocate. Please remember not to select more CPU’s than your computer has. You will get a warning at the bottom of the screen if you do.
Once your happy with the CPU count, click on the “Audio” tab on the left and make sure the box next to “Enable Audio” is checked.
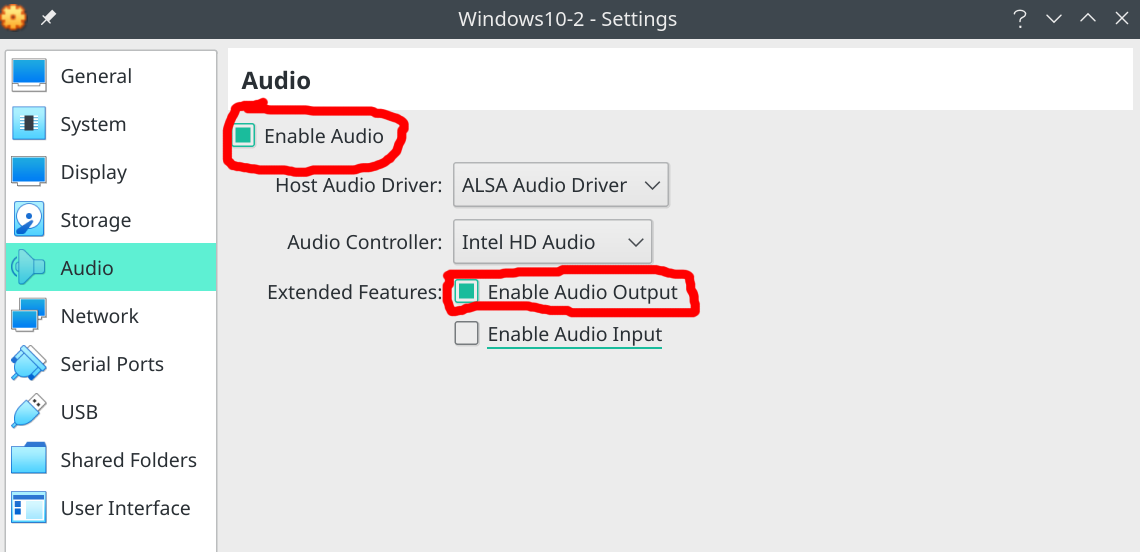
Well, you don’t have to have this option enabled, but I assume you probably want to hear some audio coming from the virtual machine.
If you would like your virtual machine to have the ability to record audio input (as is the case with screen and audio recording), then make sure the “Enable Audio Input” option is checked.
Finally, go to the “Network” tab and make sure the option “Enable Network Adapter” is checked, or else you won’t be able to access the internet.

To save your adjustments, click on “Ok” at the bottom right.
For now, these should be the only settings you need to change to get started. As you get more advanced, you may want to learn more about all the other settings that I did not cover in this section.
Step 5: Start your virtual machine
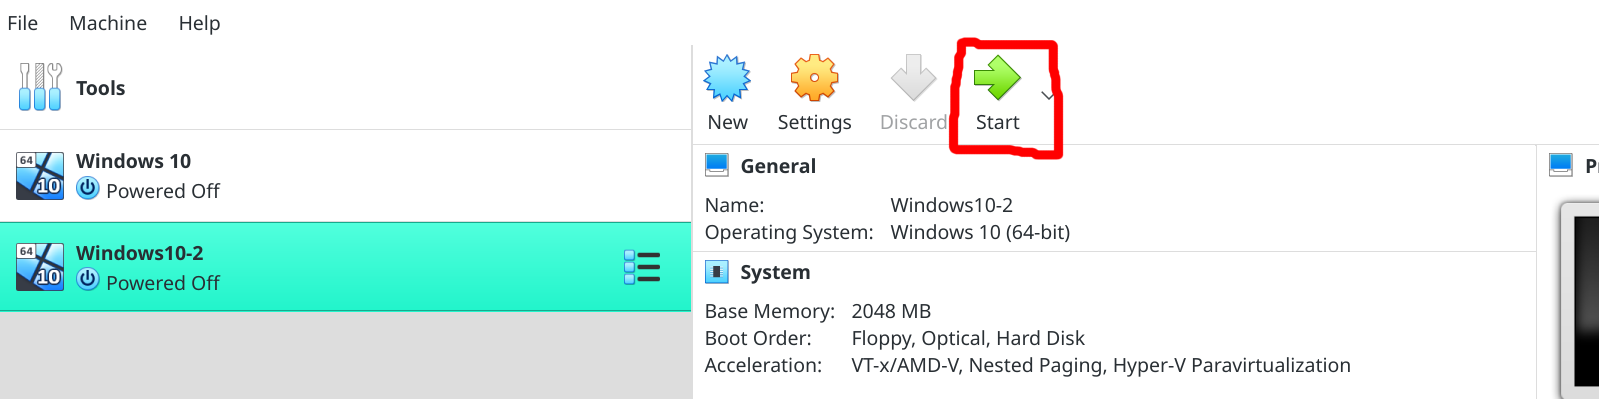
Now that we went through all the work to set up our virtual machine, we may now start running it! To start a virtual machine, make sure it is selected on the left menu and click on the “Start” button next to the “Discard” button.
A dialog may appear that asks you to choose a disk file. If the appropriate disk file is selected in the box located at the middle of the screen, then click on “Start” at the bottom right. If the appropriate disk file is not selected in the box, click on to select the appropriate ISO file from the drop down menu that appears. If the ISO file is not there, to the right of the box, click on a button that looks like a folder with a downwards pointing arrow to bring up the file navigator to search for the ISO file you downloaded earlier. Once the appropriate ISO is in the box, click on “Start”.
Step 6: Go through the installation process
Once the virtual machine has started, go through the installation process as if you were installing the operating system on a new computer.
I hope this article helped! Make sure to share this article with someone who might find it useful. If you find an error or typo in one of my articles, please let me know.
NOTE: I AM NOT LIABLE FOR ANY DAMAGES THAT HAPPEN BECAUSE OF YOU FOLLOWING ONE OF MY ARTICLES. This is not to say the information here is incorrect. Please be careful.
Thumbnail image source: https://pixabay.com/photos/board-electronics-computer-453758/